
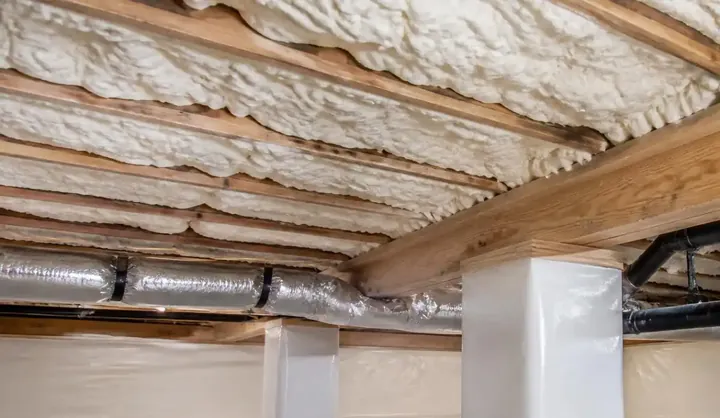
What a crawl space vapor barrier does
Soil is never truly dry, and in Charleston it is wetter than most. Water moves up through the ground and evaporates from the surface into the air under your home. With nothing covering the dirt, that moisture goes straight into the crawl space and then upward into the floor system and the living space.
A vapor barrier, also called a crawl space liner, is a continuous sheet of plastic that covers the ground and blocks that evaporation. It does not make the soil dry. It keeps the soil's moisture on the ground side of the plastic, where it cannot raise the humidity in the air you are breathing.
A vapor barrier is the single most important physical component of an encapsulated crawl space. It is also the component most often installed poorly, which is why a liner on its own does not always solve the problem.
Why quality and installation both matter
There is a large difference between a crawl space liner and the thin sheet of black plastic builders sometimes spread on the dirt. That thin plastic is typically 6 mil or less, is rarely sealed at the seams and tears the first time anyone crawls on it. It is better than nothing, but not by much.
A proper crawl space vapor barrier is a reinforced, multi-layer polyethylene product, commonly in the 12 to 20 mil range, designed to resist punctures, mildew and the foot traffic a crawl space sees over the years. Thicker and reinforced liners cost more, and they are the right choice for a space that will be accessed for HVAC service, plumbing work and inspections.
The material is only half of it. A liner that is simply laid on the ground does a poor job. The details of installation determine whether the barrier actually works.
How we install a crawl space vapor barrier
We prepare the ground first. The soil is cleared of debris, sharp objects and anything organic. Large humps and low spots are graded so the liner lies flat and will not be stressed over rocks or sticks. If standing water is present, we address drainage before the liner goes down.
We cover the ground and run the liner up the walls. The barrier extends up the foundation walls, typically to a height that lets it be sealed and fastened above the likely moisture line, and around piers and columns. This is what turns a floor covering into a true barrier, because moisture also migrates through the walls and piers.
We overlap and seal every seam. Seams are overlapped by several inches and sealed with tape made for the liner material. Unsealed overlaps let humid air and vapor through and defeat the purpose.
We seal the edges and penetrations. The liner is fastened and sealed along the walls, and we seal around pipes, posts and other penetrations so there is no gap for moisture to bypass the barrier.
We leave walkways where they are needed. In spaces that will see regular traffic, we can add protective pads or an extra layer along the main routes, such as the path to an HVAC unit.
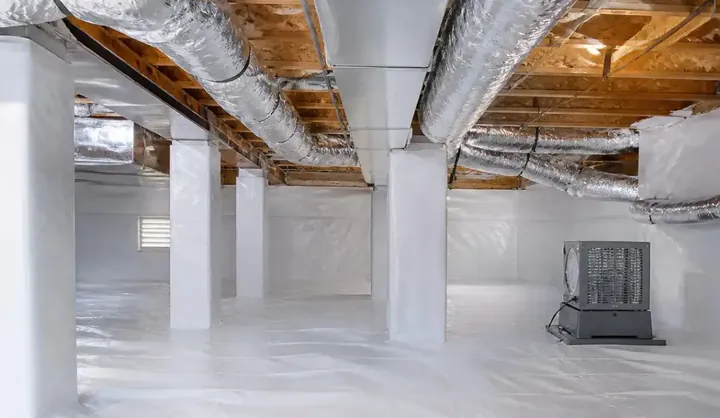
A vapor barrier alone is not encapsulation
Customers sometimes ask why we recommend more than a liner. The reason is that a vapor barrier solves one moisture source and leaves others open.
If the foundation vents are still open, humid outside air continues to flow into the space. If the space has a drainage problem, water collects on top of the liner. If there is no dehumidifier, humidity from the remaining air and from small leaks stays high. If there is wet insulation or mold on the framing, the liner covers the dirt and leaves the problem hanging above it.
That is why we usually install the vapor barrier as part of full crawl space encapsulation. There are cases where a liner by itself is the right call, such as a dry, tight crawl space in a home on higher ground that only needs better ground coverage. We will tell you honestly which situation you are in.
When a vapor barrier is the right first step
A liner on its own can make sense in a few situations.
- The crawl space is dry, clean and structurally sound, and the vents are already closed or the space is already conditioned.
- An existing liner has been damaged, is too thin, or was never sealed, and needs to be replaced or upgraded.
- You are phasing a larger project over time and need the ground covered first.
- A home sale or inspection has flagged bare soil in the crawl space.
In each case we recommend an inspection first, so we can see what the barrier needs to do before we install it.
Signs your existing liner is not working
Some homes already have a liner. If yours is on the ground and you still have problems, look for these.
- Condensation or moisture pooled on top of the plastic
- Gaps, tears or seams that have lifted or separated
- Plastic that does not reach the walls or piers
- A musty smell that persists despite the liner
- Mold on joists or subfloor above a covered floor
- Liner that is thin, brittle, torn or buried under debris
Replacing a failed liner often means removing the old one, cleaning the ground, and installing a proper barrier with the right details. Layering a new sheet over a failing one rarely solves the cause.
What a crawl space vapor barrier costs in Charleston
The price depends on the square footage of the floor, the wall and pier area that needs coverage, the liner thickness and quality, and the condition of the crawl space. A clear, dry space with easy access costs less than one that needs cleanout, grading or drainage first. Because the liner is usually part of a larger scope, we price it in the context of what the whole crawl space needs. You can see current planning ranges in our cost guide.
Why Charleston homeowners choose us for vapor barrier work
Our background is in mold inspection and remediation, so we do not install liners over contaminated soil or damp wood and call it done. We clean first, fix the cause, and install the barrier the way it is meant to be installed. We work across Charleston, from the peninsula to West Ashley, James Island and Daniel Island, and we know how local conditions change what a crawl space needs.
Common vapor barrier mistakes we see in Charleston
We get called to a lot of crawl spaces where a liner was installed and the problem stayed. The same few mistakes show up again and again.
Liner laid over debris. Sharp wood scraps and rocks puncture the plastic, and organic debris keeps feeding mold underneath it.
Seams overlapped but not sealed. Vapor and humid air pass straight through an untaped overlap.
No wall or pier coverage. A floor-only liner leaves the walls and piers wicking moisture into the space.
Thin plastic. Six mil or thinner builder plastic tears quickly and rarely survives HVAC visits and plumbing repairs.
Water ignored. Plastic over a wet, draining crawl space collects water on top and often lifts off the ground.
No plan for the rest of the system. A liner with open vents and no dehumidifier is a half measure. If your liner is already down and the space is still damp, one of these is almost certainly the reason, and the fix is usually completing the system rather than replacing everything.
Frequently asked questions
What thickness vapor barrier is best for a crawl space?
For most homes with regular access, a reinforced liner in the 12 to 20 mil range holds up far better than thin builder plastic. The right choice depends on traffic, the condition of the ground and how the space will be used. We recommend a product at inspection.
Do I need to cover the walls too?
For a complete job, yes. Moisture moves through foundation walls and piers as well as the ground. Running the liner up the walls and sealing it creates a continuous barrier.
Can I put a new liner over my old one?
Usually not. An old liner that is torn, wet or covered in debris should be removed so the ground can be cleaned and graded. Layering over a failing barrier traps moisture and hides the problem.
Will a vapor barrier stop my crawl space from smelling?
It can help a great deal, especially when the smell comes from damp soil. If the odor comes from mold on the framing, the mold needs to be treated too. See our mold remediation page.
Is a vapor barrier the same as a moisture barrier?
The terms are used interchangeably in the crawl space industry. What matters is the material, thickness and installation, not the name.
Do you install liners in crawl spaces with standing water?
We address the water first. A liner will not stop standing water, so we use drainage and a sump pump where needed and then install the barrier on a dry surface.
Ask us whether a liner alone is enough for your home. Call for an inspection.
Call (877) 720-8173